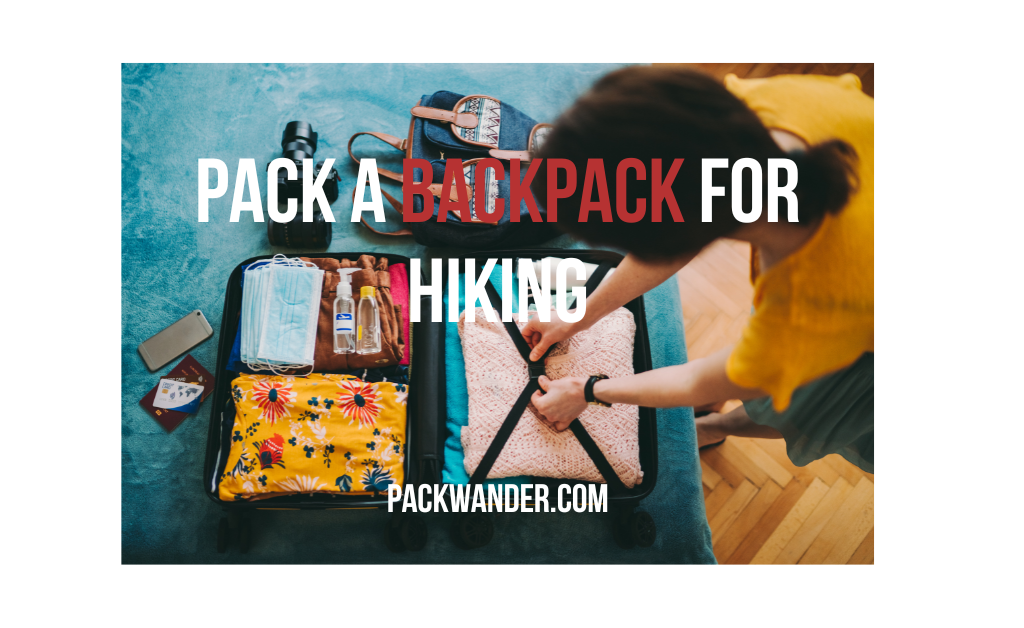
how to pack a backpack for hiking? your ultimate guide
Introduction:
Welcome to our ultimate guide on “How to Pack a Backpack for Hiking!” If you love hiking or want to try hiking for the first time, learning how to pack your backpack is super important for a fun and safe hiking adventure. Whether you’re going for a short hike or a longer one, organize backpack cane make a big difference that how much you enjoy your hiking trip.
Imagine yourself that you are surrounded by amazing nature, exploring beautiful landscapes, and feeling excited about your hiking journey. Now, imagine the opposite situation that having a heavy and messy backpack that makes you feel uncomfortable and tired. So, here we want to help you to avoid that and have the best time to enjoy your hiking experience.
In this blog post, we will teach you all the tips and tricks for packing your backpack like a hiking pro. We’ll show you how to pick the right gear and organize it smartly so that you can have a fantastic time exploring nature safely and happily. Let’s get started on this exciting hiking adventure together! also we will share some backpacking tips for beginners in this article
Table of Contents
Lets’ go to learn that how to pack a backpack for hiking in 15 steps
1. Selecting the Right Backpack:
Picking the perfect backpack for hiking is like finding a good friend to accompany you on your outdoor journey. It’s super important because it will carry all your gear and keep you comfortable throughout the hike. Let’s learn why choosing the right backpack matters so much!
1. Determining the Appropriate Size and Capacity:
The size of your backpack depends on how long and what kind of hike you plan to do. For a shorter day hike, a smaller backpack with a capacity of around 20 to 30 liters may be enough to carry essentials like water, snacks, a first aid kit, and a light jacket.
For longer adventures or multi-day hikes, you’ll need a larger backpack with a capacity of 40 liters or more. This way, you can fit in extra clothes, a sleeping bag, a tent, and other gear you might need during the trip.
2. Significance of a Well-Fitting Backpack:
A backpack that fits you well is like a cozy hug that makes you feel happy and relaxed. When your backpack fits just right, it won’t bounce around too much, and the weight will be evenly distributed on your back, shoulders, and hips.
A proper fit is essential for your comfort and safety while hiking. A backpack that’s too big or too small can cause discomfort, back pain, or even throw you off balance on the trail.
3. How to Adjust it for Comfort:
To make your backpack fit comfortably, follow these easy steps:
Shoulder Straps:
Adjust the shoulder straps so they’re snug but not too tight. They should rest comfortably on your shoulders.
Chest Strap:
Use the chest strap to keep the shoulder straps in place and prevent them from slipping off your shoulders.
Hip Belt:
The hip belt should sit on your hips, not your waist. Tighten it to transfer some of the weight to your hips, which are better at carrying heavy loads.
Load Lifters:
These are the small straps above your shoulders. Adjust them to pull the backpack closer to your back, which helps with balance.
Sternum Strap:
The sternum strap connects the shoulder straps across your chest. Adjust it to a comfortable height to keep the shoulder straps from pulling too much on your shoulders.
By choosing the right backpack and adjusting it properly, you’ll feel more comfortable and be able to enjoy your hiking adventure to the fullest! So, before you head out on your next hike, don’t forget to find your perfect backpack buddy!
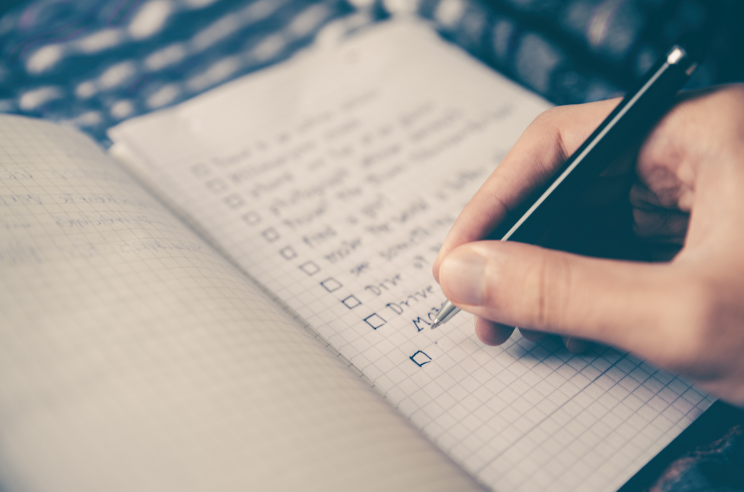
2. Make Hiking Backpack Packing Checklist:
Begin by creating a detailed checklist of all the items you’ll need for your hiking trip. Include essentials like food, water, clothing, shelter, navigation tools, first aid, and personal items. A checklist ensures you don’t forget any crucial gear.
Essentials:
- Backpack: Choose the right size and capacity based on your hike’s duration and type.
- Map and Compass: Ensure you have navigation tools to stay on track.
- First Aid Kit: Include band-aids, antiseptic wipes, pain relievers, blister treatment, and any necessary medications.
- Water: Carry enough water to stay hydrated throughout the hike.
- Snacks: Pack lightweight and energy-rich snacks like trail mix, energy bars, and fruits.
- Multi-tool or Knife: A versatile tool that can come in handy during various situations.
- Headlamp or Flashlight: Essential for night hiking or emergencies.
- Sun Protection: Sunscreen, sunglasses, and a hat to protect yourself from UV rays.
- Extra Clothing: Bring appropriate layers, including a rain jacket, depending on the weather.
- Personal Identification: Carry an ID or some form of identification.
Optional Gear (Depending on the Hike):
- Trekking Poles: For added stability, especially on challenging terrains.
- Insect Repellent: Protect yourself from pesky bugs in bug-prone areas.
- Whistle: Use it to call for help in emergencies.
- Emergency Blanket: A lightweight and compact way to stay warm in unexpected situations.
- Fire-Starting Tools: Waterproof matches or a lighter in case you need to start a fire for warmth or cooking.
Personal Items:
- Wallet: Carry some cash or a credit card for emergencies.
- Cell Phone: Keep it charged and in airplane mode to conserve battery.
- Camera: Capture the stunning views and memories of your hike.
Optional Comfort Items (Depending on Preferences):
- Trekking Towel: A quick-drying towel for staying fresh during multi-day hikes.
- Portable Stove and Cooking Gear: For longer trips where cooking meals might be necessary.
- Campsite Gear: If camping, pack a tent, sleeping bag, and sleeping pad.
Food and Water Considerations:
- Water Bottles or Hydration System: Ensure you have enough capacity for your planned hike.
- Water Filtration System: If you plan to refill water from natural sources.
- Food and Snacks: Pack enough to cover the duration of your hike.
Miscellaneous:
- Trash Bag: Carry out all your trash and leave no trace.
- Ziplock Bags: Useful for organizing smaller items and keeping them dry.
- Waterproof Cover: Keep your backpack dry during rainy weather.
- Personal Toiletries: Bring toilet paper, hand sanitizer, and any necessary personal hygiene items.
Before you embark on your hiking adventure, double-check your backpack to ensure you have everything you need. Packing smartly and efficiently will make your hike more enjoyable and memorable.
3. Organize and Categorize:
Organizing and categorizing your backpack is essential to maintain order and make it easier to access items when needed. By dividing your gear into specific groups and packing them strategically, you’ll be able to navigate your backpack more efficiently during your hike.
Here’s how you can do it:
1. Categorize Your Gear:
Start by grouping similar items together. For example, put all your food items in one category, first aid supplies in another, and clothing in a separate category.
Consider creating categories like navigation tools, personal items, safety gear, and camping equipment (if applicable).
2. Use Packing Cubes or Stuff Sacks:
- Packing cubes or stuff sacks are excellent tools for keeping items within each category organized and separate.
- Place clothes, food, and other gear into their respective packing cubes or sacks, and label them if necessary for easy identification.
3. Prioritize Essential Items:
- Ensure that frequently used items or emergency gear are easily accessible. Place them at the top or in external pockets of your backpack.
- For example, your map, compass, snacks, and water bottles should be within quick reach.
4. Distribute Weight Properly:
- Pack heavier items closer to your back and in the middle of the backpack. This positioning will help maintain better balance and stability while hiking.
- Lighter and less frequently used items can go towards the top or bottom of the backpack.
5. Separate Wet and Dry Items:
- Keep wet items (like rain gear or wet clothing) in a separate waterproof compartment or plastic bag to prevent them from soaking other gear.
- Place sensitive items like electronics or important documents in waterproof bags for added protection.
6. Utilize Outer Pockets and Straps:
- Take advantage of the external pockets and straps on your backpack to store items you might need quickly, like a water bottle, snacks, or a map.
- Just make sure these external items are secured properly so they won’t fall off during your hike.
7. Consider Weight Distribution:
- Aim for an even weight distribution on both sides of the backpack to prevent it from pulling to one side.
- Keep the center of gravity low by placing heavy items near your back and close to your waist.
8. Keep Your Backpack Balanced:
- Ensure that the weight is evenly distributed throughout the backpack. This balance will make your hike more comfortable and reduce strain on your body.
9. Review and Adjust:
- Before starting your hike, double-check your backpack’s organization to ensure you haven’t missed any important items.
- Periodically review and adjust your backpack’s organization during your hike, especially after using or adding items.
Organizing and categorizing your backpack efficiently will save you time and energy during your hike, allowing you to focus on enjoying the beautiful scenery and the thrill of the great outdoors!
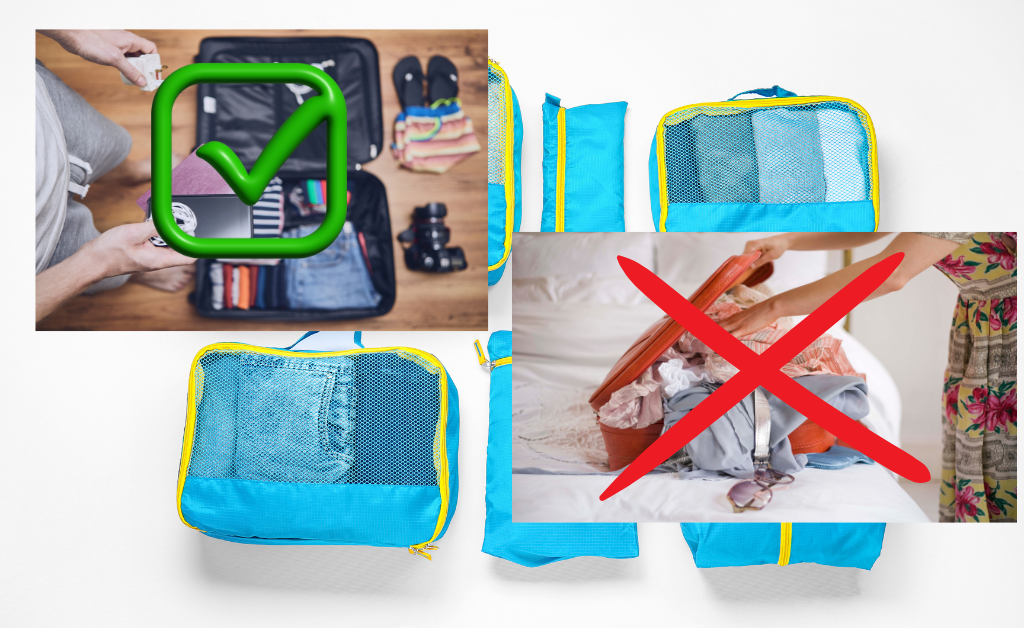
4. Use Stuff Sacks or Packing Cubes:
Using stuff sacks or packing cubes can be a game-changer when it comes to packing your backpack for hiking. These nifty organizers help you keep everything neat, tidy, and easy to find during your outdoor adventures. Let’s explore how to make the most of stuff sacks or packing cubes:
1. Group Your Stuff:
- Before you start packing, sort your gear into different groups, like clothes, food, and personal items.
- Assign a stuff sack or packing cube to each group to keep things organized.
2. Clothes in Order:
- Roll or fold your clothes neatly and place them in a dedicated stuff sack or packing cube for clothes.
- This makes it simple to find the right outfit and prevents clothes from getting jumbled up.
3. Treat Your Snacks Right:
- Use a separate stuff sack or packing cube for your snacks and food items.
- This keeps your munchies in one place and prevents them from mixing with other gear.
4. Hygiene Heroes:
- Gather your personal hygiene items like a toothbrush, toothpaste, and hand sanitizer in their own stuff sack or packing cube.
- No more digging through your bag to find that toothbrush!
5. Keep Wet and Dry Separate:
- If there’s a chance of rain or water, pack your wet clothes or rain gear in a waterproof stuff sack to protect the rest of your gear from getting soggy.
6. Mix and Match Sizes:
- Choose packing cubes or stuff sacks in different sizes to fit various items.
- Small ones are perfect for organizing tiny things, while larger ones can hold bulkier items.
7. Pack Like a Pro:
- With your gear sorted into labeled cubes or sacks, packing and unpacking your backpack becomes a breeze.
- No more rummaging through a messy bag!
8. Guard Fragile Items:
- To protect delicate items like cameras or electronics, wrap them in soft clothing and place them in a padded stuff sack.
9. Optimize Space:
- Packing cubes and stuff sacks help you utilize every inch of space in your backpack by compressing and fitting items efficiently.
10. Set Up Camp Easily:
- If you’re camping, pack your tent, stakes, and ropes in a separate stuff sack for quick and easy setup.
With stuff sacks or packing cubes, your backpack turns into a well-organized wonderland, making your hiking trips smoother and more enjoyable.
5. Weight Distribution:
Weight distribution is a critical aspect of packing your backpack for hiking. Properly distributing the weight ensures better balance, stability, and overall comfort during your hike. Here’s how to master weight distribution for a successful and enjoyable hiking experience:
1. Balance the Load:
- Distribute the weight evenly on both sides of your backpack to avoid feeling lopsided or off-balance.
- Keep heavier items closer to your back and centered in the middle of the backpack. This prevents unnecessary strain on one side of your body.
2. Pack Heavy Items Low and Close:
- Place heavier items, such as your camping gear or cookware, near the bottom of your backpack and close to your back.
- This lowers your center of gravity, providing better stability and preventing the pack from pulling you backward.
3. Use the Hip Belt:
- Tighten the hip belt snugly around your hips, and adjust it so the weight of the pack is supported by your hips rather than your shoulders.
- The hip belt transfers the weight to your body’s strongest muscles, making it easier to carry the load.
4. Place Light Items on Top:
- Lighter gear, like clothing or a sleeping bag, can be packed near the top of your backpack.
- This helps to maintain balance and ensures these items won’t get crushed by heavier gear.
5. Keep Frequently Used Items Accessible:
- Pack items you’ll need often, such as a map, snacks, or a water bottle, in easily accessible external pockets or the top lid of your backpack.
- This saves you from having to rummage through the entire pack whenever you need something.
6. Avoid Overstuffing the Top:
- Refrain from overloading the top lid or external pockets of your backpack, as it can cause the pack to become top-heavy, affecting your balance.
7. Adjust the Straps:
- Fine-tune your backpack’s load lifters and shoulder straps to ensure a snug and comfortable fit.
- Load lifters help pull the top of the backpack closer to your body, improving weight distribution and stability.
8. Consider Water Placement:
- If carrying a water bladder, place it in a sleeve or compartment close to your back and at the center of the pack.
- This keeps the water weight balanced and close to your body’s center of gravity.
9. Regularly Reassess Weight Distribution:
- Throughout your hike, pay attention to how your backpack feels on your back. If it feels unbalanced or uncomfortable, take a moment to adjust the load and straps.
By mastering weight distribution in your backpack, you’ll enhance your hiking experience, reduce fatigue, and minimize the risk of injury. A well-balanced backpack allows you to focus on the beauty of nature and fully immerse yourself in the joys of hiking!
6. Bottom of the Pack:
The bottom of your backpack is an essential area to consider when packing for a hiking trip. While it may seem like a less crucial part, how you pack the bottom of your pack can significantly impact your overall hiking experience. Here’s how to make the most of the bottom space:
1. Light and Bulky Items:
- Reserve the bottom of your backpack for lightweight, bulky items that won’t be needed until you set up camp.
- Examples include your sleeping bag, camp shoes, or a compressible pillow.
2. Compressible Gear:
- Utilize compression sacks to reduce the size of bulky items like your sleeping bag or extra clothing.
- This saves space and helps maintain better weight distribution.
3. Waterproof Protection:
- Consider placing items that need extra protection from moisture at the bottom.
- For instance, use a waterproof stuff sack for your sleeping bag or carry a rain cover to shield the contents from rain and wet terrain.
4. Base Layers and Sleepwear:
- Pack your base layers, such as thermal clothing or sleepwear, near the bottom.
- These items are typically light and won’t be needed until you’re at camp.
5. Separate Storage:
- If your backpack has a separate bottom compartment, use it wisely.
- Store your sleeping bag and other compressible gear in this compartment to keep them isolated from other items.
6. Weight Distribution:
- Even though lighter items are packed at the bottom, ensure you maintain a balanced load.
- Avoid overpacking the bottom section, as an overly stuffed or unevenly weighted backpack can negatively impact your stability on the trail.
7. Accessibility Considerations:
- While you won’t need the items at the bottom during the day’s hike, consider accessibility when packing.
- Place items you’ll need to access before setting up camp, such as rain gear or a compact stove, closer to the top or in external pockets.
8. Adjustments and Customization:
- Each backpack and hiking trip is unique, so feel free to adjust and customize your packing strategy based on your gear and specific needs.
- Test the arrangement of your gear before the actual hike to ensure a comfortable fit.
By thoughtfully organizing and utilizing the bottom space in your backpack, you can optimize your packing efficiency, make the best use of available room, and set yourself up for a successful and enjoyable hiking adventure.
7. Middle of the Pack:
The middle section of your backpack is a crucial area for distributing weight and maintaining balance during your hiking trip. It’s where you’ll store the bulk of your gear, and how you pack this section can greatly impact your comfort and overall hiking experience. Here are some tips for packing the middle of your pack:
1. Heavy Items and Gear:
- Place heavier items, such as your tent, camp stove, cooking equipment, and food, in the middle section of your backpack.
- Distribute the weight evenly on both sides to maintain balance.
2. Utilize Packing Cubes or Stuff Sacks:
- Use packing cubes or stuff sacks to organize and compartmentalize your gear in the middle section.
- This prevents items from shifting around and keeps your pack well-organized.
3. Water Bladder or Bottles:
- If using a water bladder, consider placing it in a dedicated hydration sleeve in the middle section of your pack.
- Ensure it’s positioned close to your back’s center to help maintain stability.
4. Sleeping Pad:
- If your sleeping pad doesn’t attach to the outside of your backpack, slide it into the middle section.
- Make sure it’s well-insulated from sharp objects to avoid punctures.
5. Pack Efficiently:
- Pack your gear in a way that allows you to access commonly used items without completely unpacking your backpack.
- Place items you might need during the day, like a rain jacket or snacks, closer to the top or in external pockets.
6. Consider Weight Distribution:
- While packing the middle section, periodically check the weight distribution and adjust if necessary.
- Ensure the weight is evenly distributed and centered on your back for better balance and comfort.
7. Keep Fragile Items Safe:
- Protect delicate items like your camera or other electronics by placing them in the middle of the pack and cushioning them with soft clothing or gear.
8. Secure Loose Items:
- Use compression straps or internal loops to secure any loose or dangling gear within the middle section.
- This prevents shifting and maintains stability during your hike.
9. Keep It Streamlined:
- Avoid overstuffing the middle section, as an excessively packed backpack can lead to discomfort and difficulty accessing items.
10. Personal Preference:
- The arrangement of gear in the middle section can vary based on personal preference and the type of hike.
- Experiment with different setups to find what works best for you.
By thoughtfully organizing and balancing the middle section of your backpack, you’ll enhance your hiking experience by reducing strain and discomfort. Packing efficiently ensures that you have everything you need within reach and can fully enjoy the beauty of the great outdoors.
8. Top of the Pack:
The top section of your backpack is where you’ll store items that you’ll need quick and easy access to during your hike. This area is ideal for gear you might use frequently, especially when you’re on the move. Here are some tips for packing the top of your pack:
1. Essentials at Your Fingertips:
- Keep items like your map, compass, GPS device, snacks, water bottles, and a small first aid kit in the top section.
- Having these essentials readily available will save you time and effort during your hike.
2. Hydration System:
- If you use a hydration bladder, consider placing it in a designated sleeve or pocket near the top of your pack.
- Ensure the drinking tube is easily accessible so you can stay hydrated without stopping.
3. Rain Gear:
- Store your rain jacket or poncho in the top section for quick access during sudden weather changes.
- Be prepared to shield yourself from rain or strong winds without having to unpack your entire backpack.
4. Sunscreen and Sunglasses:
- Keep your sunscreen, lip balm, and sunglasses in a small pouch or pocket on the top lid.
- This way, you can easily reapply sunscreen or protect your eyes when needed.
5. Navigation Tools:
- Stash your map, compass, or GPS device in a waterproof sleeve or ziplock bag to protect them from rain or humidity.
- Place them in a secure and easily accessible pocket.
6. Snacks and Energy Boosters:
- Pack energy bars, trail mix, or other quick snacks in a small pouch or stuff sack near the top of your pack.
- Frequent snacking helps maintain your energy levels during long hikes.
7. Camera and Binoculars:
- If you’re carrying a camera or binoculars, place them in a protective case and keep them within reach.
- You don’t want to miss capturing those breathtaking moments!
8. Keep It Light:
- The top section should not be overly packed to avoid adding excessive weight and affecting your balance.
- Prioritize essential items that you might need during your hike.
9. Emergency Items:
- Consider having a whistle, compact emergency blanket, or small flashlight easily accessible in case of emergencies.
- These items can be life-savers in unexpected situations.
10. Regular Checks:
- Throughout your hike, periodically check the top section to ensure items are secured and haven’t fallen out or shifted.
By thoughtfully organizing the top section of your backpack, you’ll save time and effort during your hike by having important items close at hand. Quick access to essentials enhances your hiking experience and allows you to fully enjoy the adventure without interruptions.
9. External Pockets and Straps:
External pockets and straps on your backpack are valuable features that offer additional storage and convenience during your hiking trip. These external compartments allow you to access certain items quickly without having to open the main compartment of your backpack. Here’s how to make the most of them:
1. Water Bottle Pockets:
- Utilize the side mesh pockets or dedicated water bottle pockets to keep your water bottles easily accessible.
- Staying hydrated is crucial, so having your water readily available is essential during your hike.
2. Snack Pockets:
- Use external pockets to store snacks, energy bars, or trail mix for quick munching on the go.
- Frequent snacking helps maintain your energy levels and keeps you fueled during your hike.
3. Rain Cover Pocket:
- Many backpacks have a dedicated pocket for storing a rain cover.
- When the weather turns wet, simply pull out the rain cover and protect your backpack and gear from getting soaked.
4. Map Pocket:
- If your backpack has a map pocket on the front, use it to store your map or trail guide for easy reference.
- It saves you from having to dig through your backpack whenever you need to check your route.
5. Hip Belt Pockets:
- Take advantage of the hip belt pockets to store small items like lip balm, sunscreen, or a compact camera.
- These pockets are within arm’s reach, allowing you to access essentials without taking off your backpack.
6. Trekking Pole Loops:
- If your backpack has external loops or bungee cords, use them to attach and secure your trekking poles when not in use.
- This frees up space inside the backpack and provides easy access to your poles when needed.
7. Compression Straps:
- Use compression straps to secure your gear and prevent it from shifting inside the backpack.
- These straps also help maintain a compact profile and prevent your load from becoming top-heavy.
8. Sleeping Pad Straps:
- If your backpack has straps on the bottom or sides, use them to secure your sleeping pad or tent.
- This keeps these bulky items outside the main compartment and frees up valuable space inside.
9. Keep It Organized:
- While external pockets and straps offer convenience, avoid overloading them to maintain a balanced and streamlined backpack.
- Prioritize frequently used items or gear that you might need during your hike.
10. Regular Checks:
- Throughout your hike, periodically check external pockets and straps to ensure everything is secure and hasn’t come loose.
By efficiently using the external pockets and straps on your backpack, you can access essential items quickly and keep your gear organized, enhancing your overall hiking experience. Happy hiking and enjoy the convenience of your well-equipped backpack!
10. Keep Essentials Within Reach:
Keeping essentials within reach is a key strategy for a smooth and enjoyable hiking experience. When you have important items readily accessible, you save time and effort, allowing you to focus on the beauty of nature and the thrill of the hike. Here’s how to keep your essentials easily reachable:
1. Use External Pockets:
- Utilize the external pockets on your backpack to store items you’ll need frequently during your hike.
- Items like water bottles, snacks, a map, or a compass can be kept in these pockets for quick access.
2. Hip Belt Pockets:
- Take advantage of the hip belt pockets on your backpack.
- Store small items like a camera, sunscreen, lip balm, or a small first aid kit in these pockets for easy retrieval.
3. Map and Navigation Tools:
- Keep your map and navigation tools, such as a compass or GPS device, in a designated pocket on the top lid or in a front pocket.
- This way, you can check your route without having to unpack your entire backpack.
4. Water Bottles and Hydration Bladder:
- Place your water bottles in easily accessible side pockets or dedicated water bottle pockets on the sides of your backpack.
- If using a hydration bladder, keep it in a designated sleeve or pocket with the drinking tube within reach.
5. Snacks and Energy Boosters:
- Store snacks, energy bars, or trail mix in an external pocket or a hip belt pocket.
- Frequent snacking helps maintain your energy levels during the hike, so having snacks within reach is essential.
6. Rain Gear:
- Keep your rain jacket or poncho in an outer pocket or at the top of your backpack.
- Sudden weather changes won’t catch you off guard, and you can quickly protect yourself from rain or strong winds.
7. Camera and Binoculars:
- If you’re carrying a camera or binoculars, place them in a protective case and keep them in an easily accessible pocket or hanging from a strap.
- Capture those special moments without delay.
8. First Aid Kit:
- Keep a small first aid kit in an external pocket or an easily accessible compartment within your backpack.
- Be prepared to address minor injuries promptly.
9. Personal Items:
- Carry personal items like your cell phone, wallet, or identification in a pocket that is easily reachable, such as the top lid or a front pocket.
10. Regular Checks:
- Throughout your hike, periodically check the accessibility of your essentials and adjust as needed.
- Make sure items haven’t shifted or fallen out of their designated pockets.
By arranging your gear strategically and keeping essentials within reach, you’ll enhance your hiking experience by staying prepared and organized throughout the journey. This way, you can fully embrace the wonders of nature and create lasting memories on your hiking adventure.
11. Water and Hydration:
Water and hydration are of utmost importance during a hiking trip. Staying properly hydrated is essential for your overall well-being, comfort, and safety while exploring the great outdoors. Here are some tips to ensure you have enough water and stay hydrated during your hike:
1. Carry Sufficient Water:
- Before setting out, calculate the estimated amount of water you’ll need based on the duration and intensity of your hike.
- Bring an adequate supply of water to last the entire hike, including a little extra for emergencies.
2. Hydration Bladder or Water Bottles:
- Choose a hydration system that suits your preference: a hydration bladder or water bottles.
- Hydration bladders are convenient as they allow you to drink on the go using a hose and mouthpiece.
- Water bottles are easy to access and refill, and you can keep track of your water intake.
3. Utilize External Pockets:
- If you use water bottles, place them in external mesh pockets or designated bottle pockets for easy access.
- This way, you can quickly grab a drink without having to open your backpack.
4. Hydration Bladder Sleeve:
- If using a hydration bladder, place it in a dedicated sleeve inside your backpack.
- Ensure the drinking tube is easily reachable so you can sip water without stopping.
5. Regular Water Breaks:
- Schedule regular water breaks during your hike, especially on hot and strenuous trails.
- Take sips of water every 15-20 minutes to maintain hydration.
6. Drink Before You’re Thirsty:
- Don’t wait until you feel thirsty to drink water.
- Thirst is a sign that your body is already becoming dehydrated, so drink consistently to prevent this.
7. Hydrate at Rest Stops:
- Take advantage of rest stops to hydrate and refill your water supply if available.
- Use these breaks to rehydrate and rest your body.
8. Electrolyte Balance:
- Consider carrying electrolyte tablets or powder to replenish salts lost through sweating.
- Balancing electrolytes is essential for maintaining proper hydration.
9. Avoid Overexertion:
- Pace yourself and avoid pushing your body beyond its limits.
- Overexertion can lead to increased sweating and dehydration.
10. Monitor Hydration Levels:
- Pay attention to signs of dehydration, such as dry mouth, dark urine, fatigue, or dizziness.
- If you notice these signs, take a break and drink more water.
Remember that staying hydrated is vital for your health and well-being while hiking. Proper water management ensures you have the energy and focus to enjoy the beauty of nature and complete your hike safely. Happy hiking and stay hydrated!
12. Compression Straps:
Compression straps are a valuable feature found on many hiking backpacks. They are adjustable straps located on the sides of the backpack, and sometimes on the front or bottom, that help compress and stabilize the load inside your pack. Here’s how compression straps can be beneficial during your hiking adventures:
1. Load Compression:
- Compression straps allow you to tighten the backpack’s contents, reducing the overall volume and preventing items from shifting during your hike.
- By compressing the load, you maintain a compact profile, which improves your balance and stability on the trail.
2. Weight Distribution:
- When properly used, compression straps help distribute the weight evenly throughout the backpack.
- This balanced weight distribution ensures that you won’t feel weighed down on one side, reducing strain and discomfort during long hikes.
3. Secure Gear:
- Use compression straps to secure and stabilize larger items, such as a tent or sleeping bag, on the outside of your backpack.
- This prevents these bulky items from shifting and keeps them securely attached to your pack.
4. Prevent Swinging:
- If you have items attached to the outside of your backpack, such as trekking poles or a sleeping pad, compression straps can prevent them from swinging while you walk.
5. Keep It Streamlined:
- Properly compressed gear creates a streamlined backpack, reducing the chances of your pack snagging on branches or other obstacles on the trail.
6. Adjust for Comfort:
- You can adjust the tightness of the compression straps according to your preferences and the amount of gear you’re carrying.
- Tighten or loosen them based on the terrain and your comfort level.
7. Emergency Storage:
- Compression straps can be used to temporarily attach additional gear or clothing to the outside of your backpack in case your pack is already full.
- Just be mindful of the added weight and make sure the items are well-secured.
8. Enhance Stability:
- If you’re hiking with a partially empty backpack, use compression straps to compress the load and prevent gear from shifting around.
9. Easy Access Pockets:
- Some backpacks have compression straps that also serve as side pockets.
- You can use these pockets to store items you need quick access to, such as a water bottle or a map.
10. Check Before Hiking:
- Before starting your hike, double-check the compression straps to ensure they are properly tightened and secure.
- Periodically check them during your hike to ensure they haven’t loosened.
By understanding how to use compression straps effectively, you can optimize your backpack’s load, improve comfort, and make your hiking experience more enjoyable.
13. Test Your Backpack:
Testing your backpack before embarking on a hiking trip is a crucial step to ensure that it’s comfortable, well-fitted, and suitable for your needs. Here’s a checklist of things to consider when testing your backpack:
1. Load Your Gear:
- Pack your backpack with all the gear you intend to take on your hike, including clothing, food, camping equipment, and other essentials.
2. Weight Distribution:
- Distribute the weight evenly throughout the backpack, keeping heavier items closer to your back and centered in the middle.
3. Comfort and Fit:
- Put on the backpack and adjust the shoulder straps, hip belt, and load lifters for a secure and comfortable fit.
- Make sure the hip belt rests on your hips and not on your waist, as it should support the majority of the weight.
4. Walk Around:
- Take a walk around your home or a nearby area with the loaded backpack.
- Pay attention to how it feels on your back, shoulders, and hips. Ensure there are no pressure points or discomfort.
5. Test Stability:
- Do some light movements, like bending, twisting, and leaning forward, to check the stability of the pack.
- The backpack should stay snugly against your back and not sway excessively.
6. Straps and Buckles:
- Verify that all straps and buckles are in good condition and securely fastened.
- Ensure that they are easy to adjust and won’t come undone during your hike.
7. Hip Belt and Shoulder Straps:
- Check the padding and cushioning on the hip belt and shoulder straps for comfort.
- Make sure they don’t cause chafing or discomfort, especially during extended use.
8. Accessibility:
- Test the accessibility of external pockets and compartments.
- Ensure that items you might need frequently, like a water bottle or snacks, are easy to reach.
9. Load Balance:
- Walk around with the loaded backpack and assess the balance of the load.
- Adjust the weight distribution if necessary to maintain balance and stability.
10. Strap Length:
- Ensure that the straps are adjustable to accommodate your height and torso length.
- Some backpacks offer different sizes, so choose one that fits you best.
By thoroughly testing your backpack, you can identify any issues or discomforts before you hit the trail. It allows you to make adjustments, ensure the backpack is well-suited for your needs, and guarantees a more enjoyable and successful hiking experience.
14. Regularly Used Items:
Regularly used items are the essential gear and supplies that you’ll need easy access to during your hiking trip. These items are the ones you’ll use frequently and should be kept within reach for convenience. Here’s a list of regularly used items to consider when organizing your backpack:
1. Water Bottles or Hydration Bladder:
- Staying hydrated is vital during your hike, so keep your water bottles or hydration bladder easily accessible in external pockets or designated compartments.
2. Snacks and Energy Food:
- Pack energy bars, trail mix, or other snacks in a pocket or compartment that you can quickly reach.
- Frequent snacking helps maintain energy levels during the hike.
3. Map and Navigation Tools:
- Keep your map, compass, or GPS device in a pocket on the top lid or in a front pocket for easy reference.
- Quick access to navigation tools ensures you stay on the right path.
4. Sunscreen and Lip Balm:
- Store sunscreen and lip balm in a hip belt pocket or an outer pocket for easy application when needed.
5. First Aid Kit:
- Keep a small first aid kit in an accessible pocket or compartment within your backpack.
- This way, you can address minor injuries promptly.
6. Rain Gear:
- Store your rain jacket or poncho in an outer pocket or at the top of your backpack for quick protection during sudden showers.
7. Camera or Binoculars:
- If you’re carrying a camera or binoculars, keep them in a protective case and within reach for capturing special moments or observing wildlife.
8. Personal Items:
- Carry items like your cell phone, wallet, identification, and any personal medications in pockets that are easily reachable.
9. Multi-Tool or Knife:
- Keep your multi-tool or pocket knife in an accessible pocket or attached to your belt for quick access.
10. Tissue or Hand Sanitizer:
- Carry a small pack of tissue or a travel-sized hand sanitizer in an easily reachable pocket for hygiene needs.
11. Insect Repellent:
- Store insect repellent in an outer pocket or attached to your backpack’s hip belt for easy application.
12. Trekking Poles:
- If you’re using trekking poles, keep them attached to your backpack or within reach when not in use.
13. Hat and Sunglasses:
- Carry a hat and sunglasses in a pocket or a loop on your backpack to shield yourself from the sun.
By keeping regularly used items within reach, you’ll save time and effort during your hike, ensuring that you can access important gear quickly and focus on enjoying the beauty of nature. Happy hiking and keep your essentials at your fingertips!
15. Practice Packing:
Practicing packing your backpack before your actual hiking trip is a smart way to ensure that you’re organized, efficient, and well-prepared. By doing a trial run, you can identify any issues, make adjustments, and familiarize yourself with your gear. Here’s a step-by-step guide for practicing packing:
1. Gather Your Gear:
- Collect all the gear and supplies you plan to take on your hiking trip, including clothing, food, camping equipment, and other essentials.
2. Lay Out Your Backpack:
- Lay your empty backpack on a flat surface and unzip all compartments.
- Open any compression straps or pockets that you plan to use.
3. Organize Your Gear:
- Group similar items together, such as clothing, food, cooking gear, personal items, and navigation tools.
- This will help you see the big picture and organize your packing efficiently.
4. Create a Checklist:
- Make a checklist of all the items you plan to pack.
- Tick off each item as you place it in the backpack to ensure nothing is left behind.
5. Start Packing:
- Begin packing your backpack, starting with the larger and heavier items first.
- Place items like your tent, sleeping bag, and camp stove closer to the bottom and centered in the middle for better weight distribution.
6. Use Packing Cubes or Stuff Sacks:
- Utilize packing cubes or stuff sacks to organize and compartmentalize your gear.
- This will keep your backpack well-organized and make it easier to find items during your hike.
7. Load Balance and Weight Distribution:
- As you pack, periodically check the balance of your load.
- Adjust the weight distribution to maintain balance and prevent the backpack from feeling lopsided.
8. External Pockets and Straps:
- Use external pockets and straps to store regularly used items like water bottles, snacks, or a map.
- Ensure these items are easily accessible and won’t get in the way of other gear.
9. Compression and Straps:
- Once your backpack is packed, utilize compression straps to compress the load and stabilize your gear.
- Adjust shoulder straps, hip belt, and load lifters for a comfortable and secure fit.
10. Walk Around with the Backpack:
- After packing your backpack, put it on and walk around your home or backyard to test the comfort and stability.
- Pay attention to how the backpack feels on your back and make any necessary adjustments.
By practicing packing your backpack, you can fine-tune your organization skills and make sure you have everything you need for a successful hiking trip. This preparation ensures that you’re ready to hit the trail with confidence, knowing that your gear is well-packed and optimized for your adventure. Happy hiking and happy packing!
10 common mistakes while packing a backpack for hiking:
- Overpacking: Carrying Too Much Gear
- Poor Weight Distribution: Imbalanced Load
- Neglecting a Checklist: Forgotten Essentials
- Packing Fragile Items at the Bottom: Insufficient Protection
- Ignoring Weather Conditions: Unprepared for the Elements
- Not Using Waterproof Bags: Risk of Wet Gear
- Improper Use of External Straps: Unstable Attachment
- Packing Heavy Items at the Top: Top-Heavy Backpack
- Disorganized Packing: Difficulty Finding Items
- Neglecting Leave No Trace Principles: Environmental Impact
Frequently Ask Questions (FAQs)
Q1: What is the best way to pack a hiking bag?
The best way to pack a hiking bag is to follow a systematic approach that ensures efficiency, comfort, and balance. Here are the key steps to pack your hiking bag effectively:
- Choose the right backpack size for your trip’s duration and gear requirements.
- Create a checklist of essential items to ensure nothing important is left behind.
- Organize and categorize your gear into groups like food, clothing, sleeping gear, and cooking equipment.
- Use stuff sacks or packing cubes to keep items organized and easily accessible.
- Distribute weight properly by placing heavier items closer to your back and center of gravity.
- Pack bulky and lightweight items at the bottom, heavier gear in the middle, and frequently used items on top or in external pockets.
- Utilize compression straps to stabilize the load and prevent shifting.
- Test the backpack’s fit and adjust shoulder straps, hip belt, and sternum strap for comfort.
- Practice packing before your hike to ensure you have everything you need without unnecessary weight.
Q2: How do I organize my hiking backpack?
To organize your hiking backpack efficiently, follow these steps:
- Sort your gear into categories (food, clothing, sleeping gear, etc.).
- Use stuff sacks or packing cubes to keep items within categories organized.
- Place your sleeping bag and clothes you won’t need during the day at the bottom of the backpack.
- In the middle section, pack heavier gear like cooking equipment and food.
- Keep frequently needed items at the top or in external pockets for easy access.
- Store essential items like first aid kit, multi-tool, and flashlight in reachable spots.
- Utilize external pockets and straps for quick access to items like a water bottle or rain jacket.
Q3: How do you pack a hiking backpack with clothes?
When packing a hiking backpack with clothes, use the following tips:
- Roll or fold clothes tightly to save space and minimize wrinkles.
- Place clothing items inside a compression sack or a separate stuff sack to keep them organized and compact.
- Pack clothing at the bottom of the backpack to serve as cushioning for other gear.
- Keep frequently used clothing (like a rain jacket) at the top or in external pockets for easy access.
- Use plastic bags or dry bags to separate clean and dirty clothes during the hike.
Q4: How do you pack a long hiking backpack?
Packing a long hiking backpack requires thoughtful organization to manage the additional gear. Follow these steps:
- Prioritize essentials and avoid redundant items to save space and weight.
- Utilize packing cubes or stuff sacks to organize clothes and gear efficiently.
- Place lightweight and bulky items at the bottom, heavy gear in the middle, and frequently used items on top or in external pockets.
- Use compression straps to stabilize the load and prevent shifting.
- Consider packing fewer clothes and plan for laundry or re-wearing items on longer hikes.
- Distribute weight evenly to maintain balance and comfort during extended periods of walking.
Conclusion:
Properly packing a backpack for hiking is an essential skill for any outdoor enthusiast. By following these steps and guidelines, you can ensure a comfortable and enjoyable hiking experience. Remember to pack light, stay organized, and adhere to Leave No Trace principles to preserve the beauty of our natural environments for future generations.